You want to send email between two or more different email account locally or using the server, localhost.
Note that I have used the following while writing this:
- XAMPP Control Panel Version 2.5.8 / XAMPP for Windows ver. 1.7.3
- Mercury/32 ver. 4.7
- Mozilla Thunderbird ver. 2.0.0.24
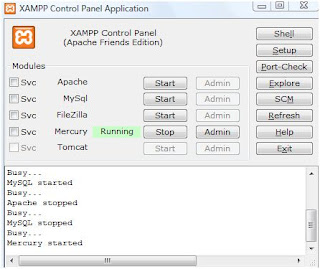
In XAMPP Control Panel: Start Mercury. Lanuch Mercury (the Admin button).
Under configuration and in Protocol Modules, the following needs to be checked or active:
MercuryS SMTP Server
MercuryP POP3 Server
MercuryE SMTP end to end delivery client
MercuryD distributing POP3 client
MercuryH PH directory service server
MercuryB HTTP web server(it seems that this can be active or inactive.)
To create the new email address or users, go to Configuration then Manage local users.
Click on add.
The username will be part of the local email address.
If you key in mrbean in the username field, the email address that you will use locally is mrbean@localhost. Username is of course mrbean.
The personal name can be just a name you use in the real world; e.g Mr Funny Bean
Maill password and username will be used to access email in your inbox. You have to remember it.
Its seems that it isn't compulsory to fill in the APOP secret.( think this has got to with security) .
Close the manage local user window and return back to the main screen.
The components namely POP3 server and SMTP server will have the status of 'Ready'.
-END of mercury mail-
Launch Thunderbird.
Under tools, go to account settings.
This window will open...
Click Add Account.
A new window appears.
First screen: Account type is email of course.
Second screen:Identity
In email address, fill in the email you have created with Mercury, use the example from above, the email is mrbean@localhost (ignore the .com at the back for now. )
Third Screen: Server Information
Selection is POP.
Name of incoming server is localhost.
The rest of the screens just leave it as it is.
Back to Account Settings Window. This time at the side bar on the left click on Outgoing Server (SMTP).
Click on the Add located at the right.
New window appears.
Description can be any meaningful text for you.
Server name is localhost.
Username is the username created in Mercury just now. Using the example above, it is mrbean.
Click ok.
Account Settings Window again.
On the side bar at the left select the email account you created just now.
On the Outgoing Server(SMTP) drop down, select the one you created in the previous step.
Everything is done and ready to go. Try getting mail from inbox, there will be a prompt to enter the password. The password is the one created in Mercury.
Try composing and send the email.
Another reference


No comments:
Post a Comment